|
|
Sound guide - Windows XP
|
|
|
This sound set-up guide will help you change the sound settings on your PC and in Skype to get the best sound performance out of Skype.
These instructions are for Windows XP only. Sound guides
are also available for Windows
Vista and Windows
7.
How to…
Finding your PC’s audio settings
- Click Start > Control Panel.

- Click Sounds, Speech, and Audio Devices in the Control Panel.

- Click Sounds and Audio Devices in the Sound, Speech, and Audio Devices screen.

The Sounds and Audio Devices Properties screen is displayed.

Changing your PC’s playback options
- In the Sounds and Audio Devices Properties screen, select the Audio tab.
- In the Sound playback section, select the device Skype uses from the drop-down list and click Volume.

- In the Volume Control screen displayed, click Options > Properties.

- In the Properties screen displayed, ensure all of the boxes displayed under Show the following volume controls are checked and click OK.

- In the Volume Control screen, ensure that the Microphone section’s Mute box is checked and that all other Mute boxes in the Volume Control screen are unchecked. Then click Options > Exit.

Changing your PC’s recording options
- In the Sounds and Audio Devices Properties screen, select the Audio tab.
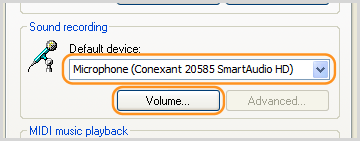
- In the Sound recording section, select the device Skype uses from the drop-down list and click Volume.

- In the Recording Control screen, click Options > Properties.

- In the Properties screen displayed, ensure all of the boxes displayed under Show the following volume controls are checked and click OK.

- In the Recording Control screen, click Options > Advanced Controls to display the Advanced button under Microphone. Click Advanced.

- Under Other Controls, ensure that the Microphone Gain Control box is unchecked and click Close.

- In the Recording Control screen, click Options > Exit.
- Make a test call in Skype
to check your microphone.
- If you’re having problems with the microphone, click Start > All Programs > Accessories > Entertainment > Sound Recorder to display the Sound Recorder.

Try to record your speech though your microphone, then play it back.
If you can't hear what you recorded, re-display the Sounds and Audio Devices Properties screen (see above) and play with the microphone settings until the recording test works.
If you can hear your recording, ensure that your audio settings in Skype are correct.
Checking your audio settings in Skype
- Sign in to Skype.
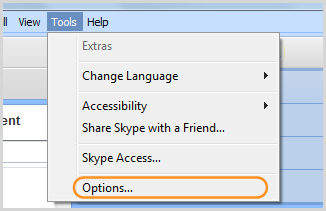
- Click Tools > Options.

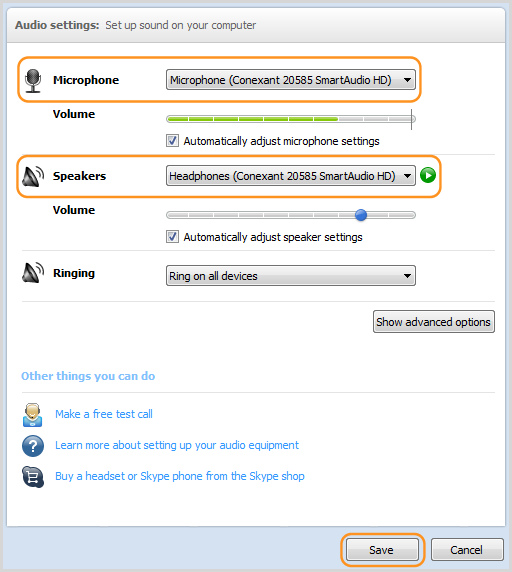
- In the Options screen, click Audio Settings. Select the devices you chose in the Sounds and Audio Devices Properties screen from the Microphone and Speakers drop-down lists and click Save.

- Make a test call in Skype
to check your audio settings.
If you are having problems with your speakers or microphone:
- Re-display the Sounds and Audio Devices Properties screen (see above).
- In the Sound playback section, click Volume to display the Volume Control screen and ensure that:
- Mute all is unchecked.
- The Wave section’s Mute is unchecked.
- The Microphone section’s Mute is checked.
The other sections (such as CD Player, Video and 3D Depth) are not important.
- Re-display the Sound and Audio Devices Properties screen.
- In the Sound recording section, click Volume to display the Recording Control screen and ensure that all of the Mute boxes are unchecked.
- Make another test call in Skype to see if the changes you have made have fixed your audio problems.
Learn more about how
to improve your audio quality.
|
|